How to fill a Stack widget and why?
You can say that the "how" is easy
Stack(
  children: [
    Positioned.fill(
      child: FlutterLogo(),
    ),
  ],
)
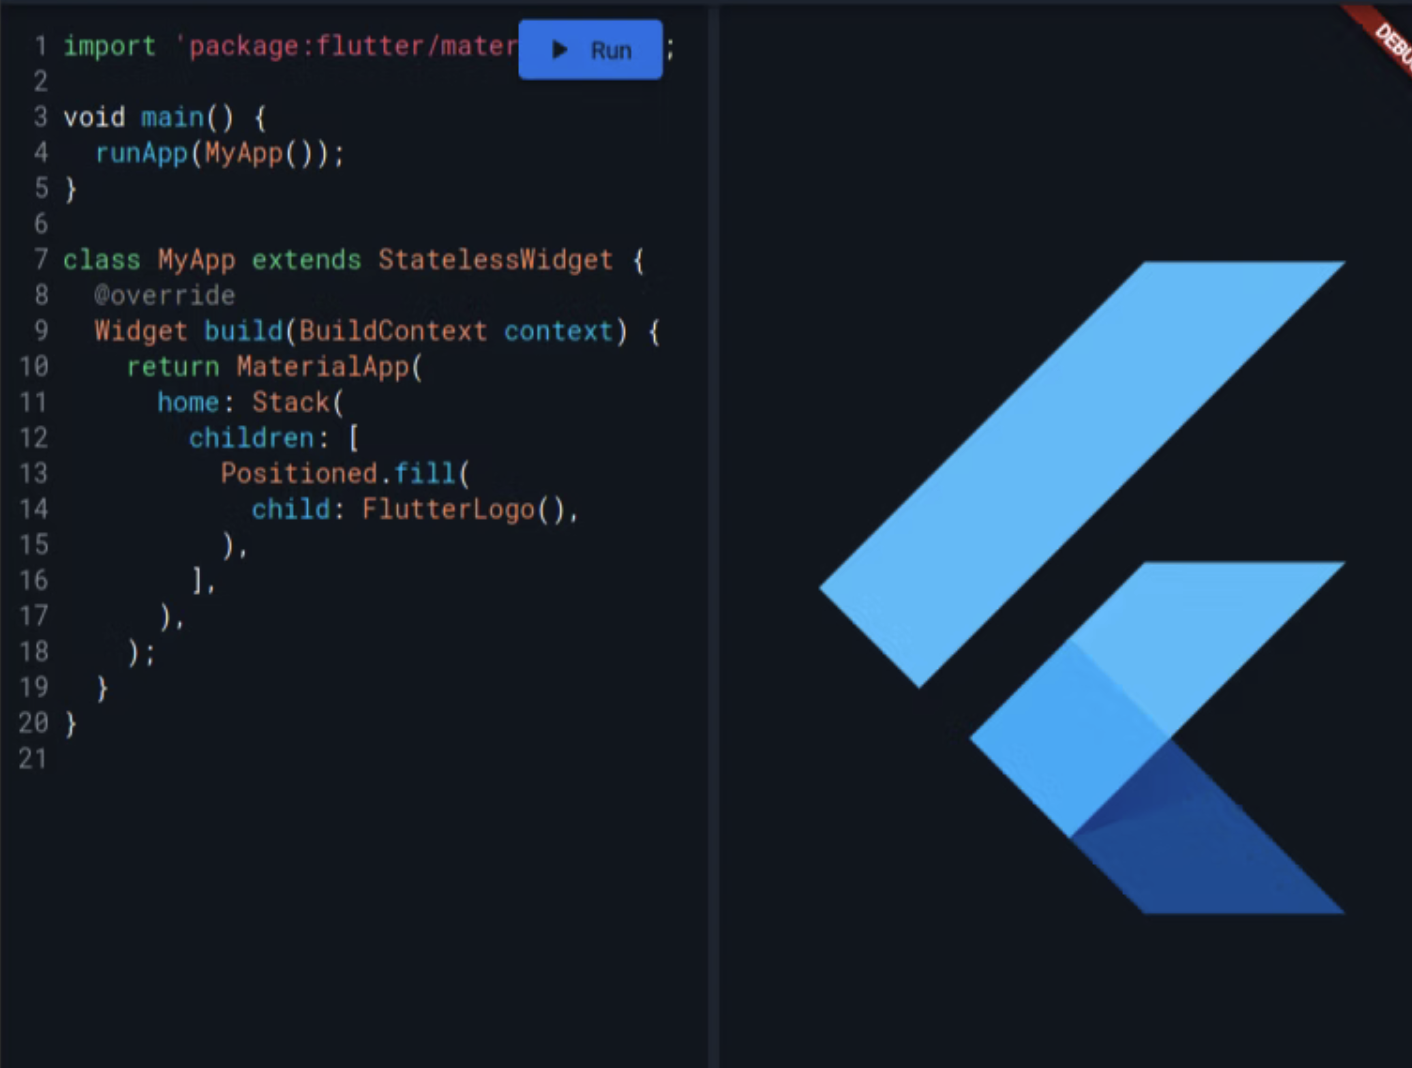
The more important question is why when we place a widget in a Stack it appears in the top left corner.
Stack(
  children: [
    child: FlutterLogo(),
  ],
)
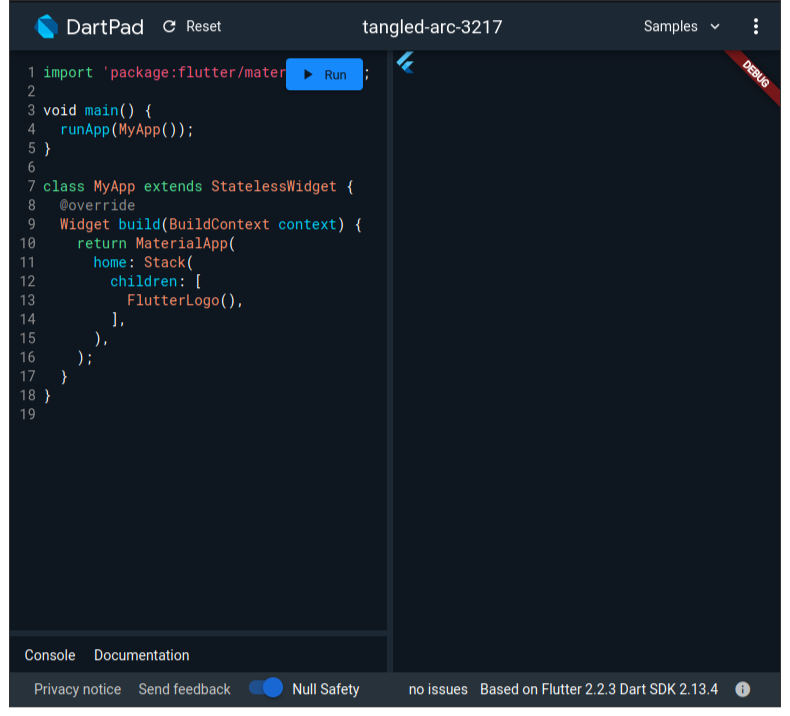
Well the reason is constraints. Constraints are passed to a widget from its parent and are defined as min height, min width, max height, and max width. We can illustrate that better with an example. Let's see what are the constraints that FlutterLogo gets when it is placed in a Stack:
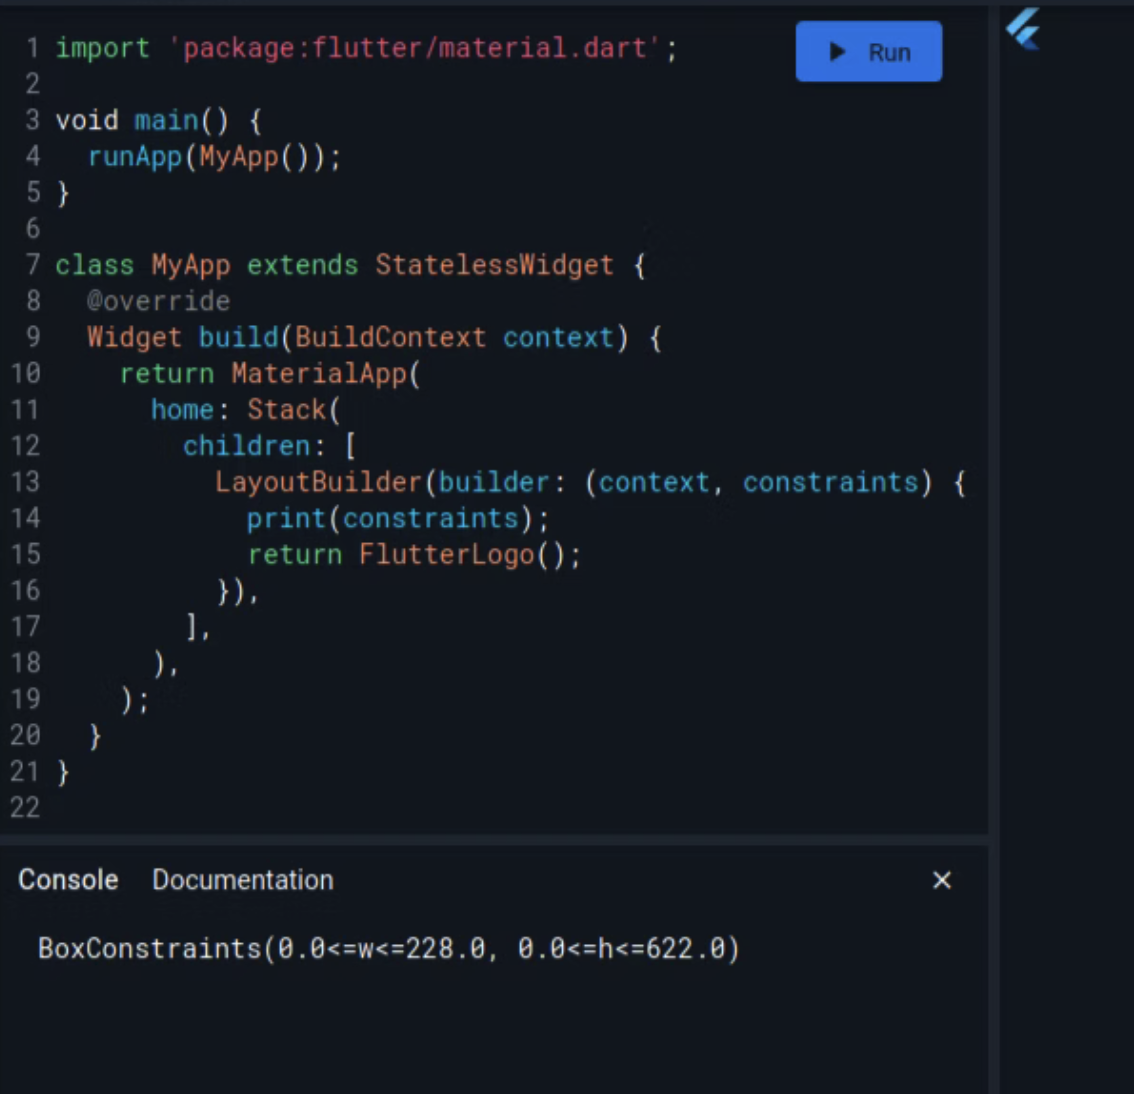
LayoutBuilder allows us to see the constraints from the Stack widget as they are passed down to FlutterLogo. We can see that the Stack widget tells its children they can be as small as they want but no bigger than 220 logical pixels wide and 622 logical pixels high. Or in technical terms min height = 0, min width = 0, max height = 622, max width = 228.
Take a moment to think what constraints would you pass to the child in order to let it know it has to fill all available space.
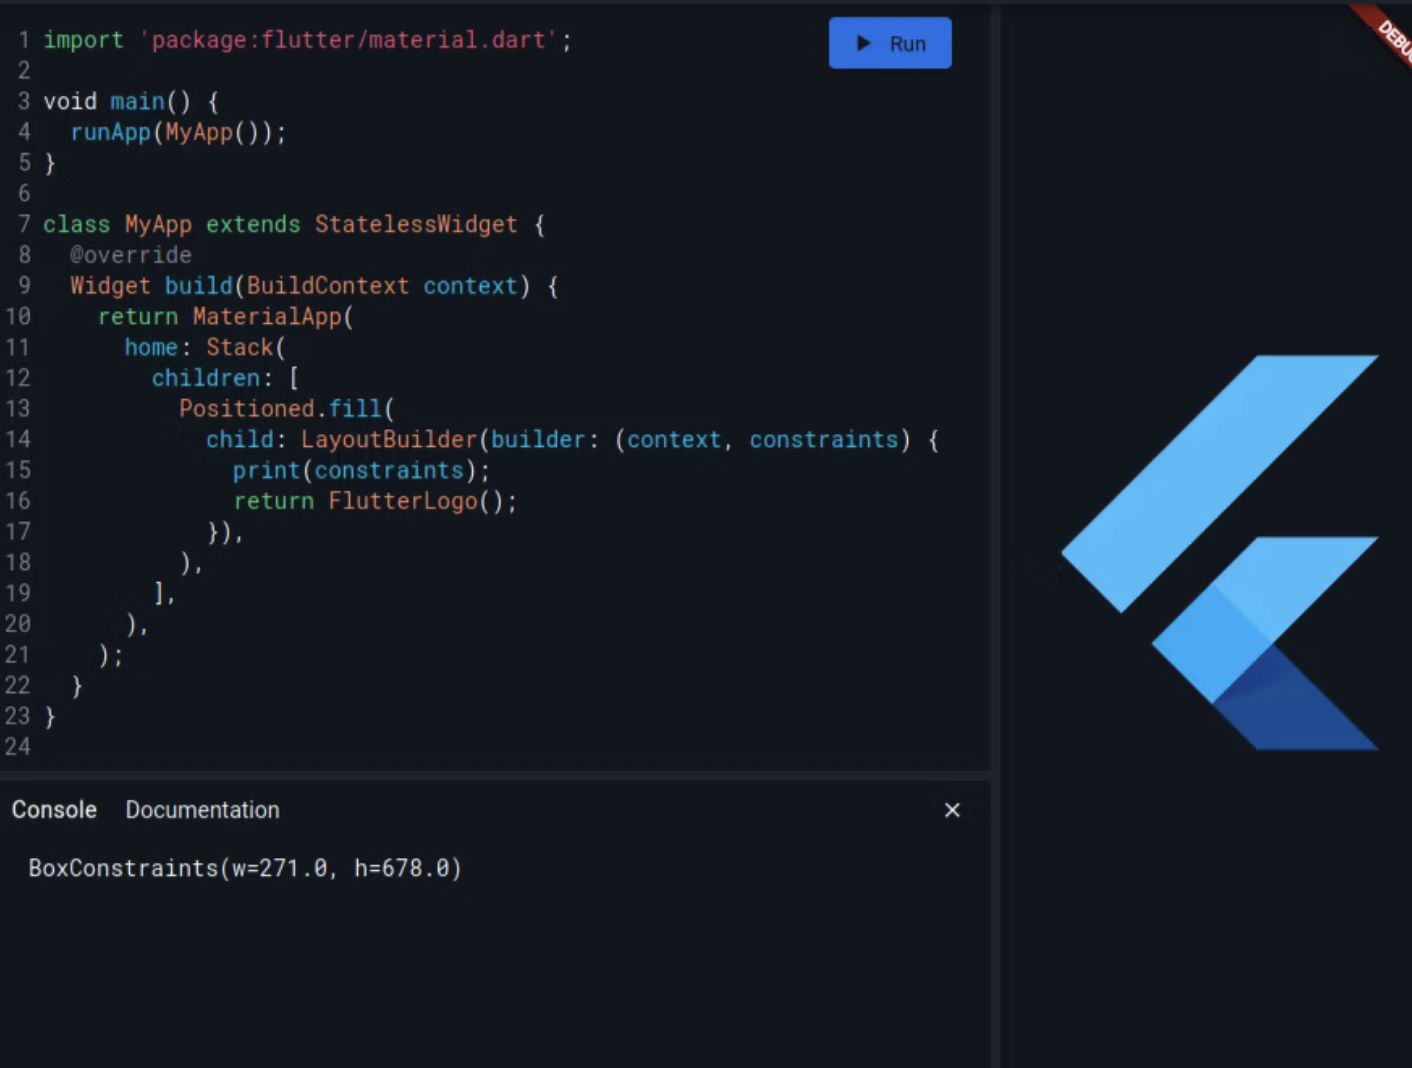
Now lets see how using Positioned.fill as the parent of FlutterLogo affects the constraints that FlutterLogo gets
import 'package:flutter/material.dart';

void main() {
  runApp(MyApp());
}

class MyApp extends StatelessWidget {
  @override
  Widget build(BuildContext context) {
    return MaterialApp(
      home: Stack(
        children: [
          Positioned.fill(
            child: LayoutBuilder(builder: (context, constraints) {
              print(constraints);
              return FlutterLogo();
            }),
          ),
        ],
      ),
    );
  }
}
This time we can see that the constraints that FlutterLogo receives tell it that it must be exactly 271px wide and 378px high. So it is not free to size itself and must match these constraints.
Another way to demonstrate the effect of constraints would be with ConstrainedBox, which can set additional constraints to its child, in addition to the constraints from its own parent.
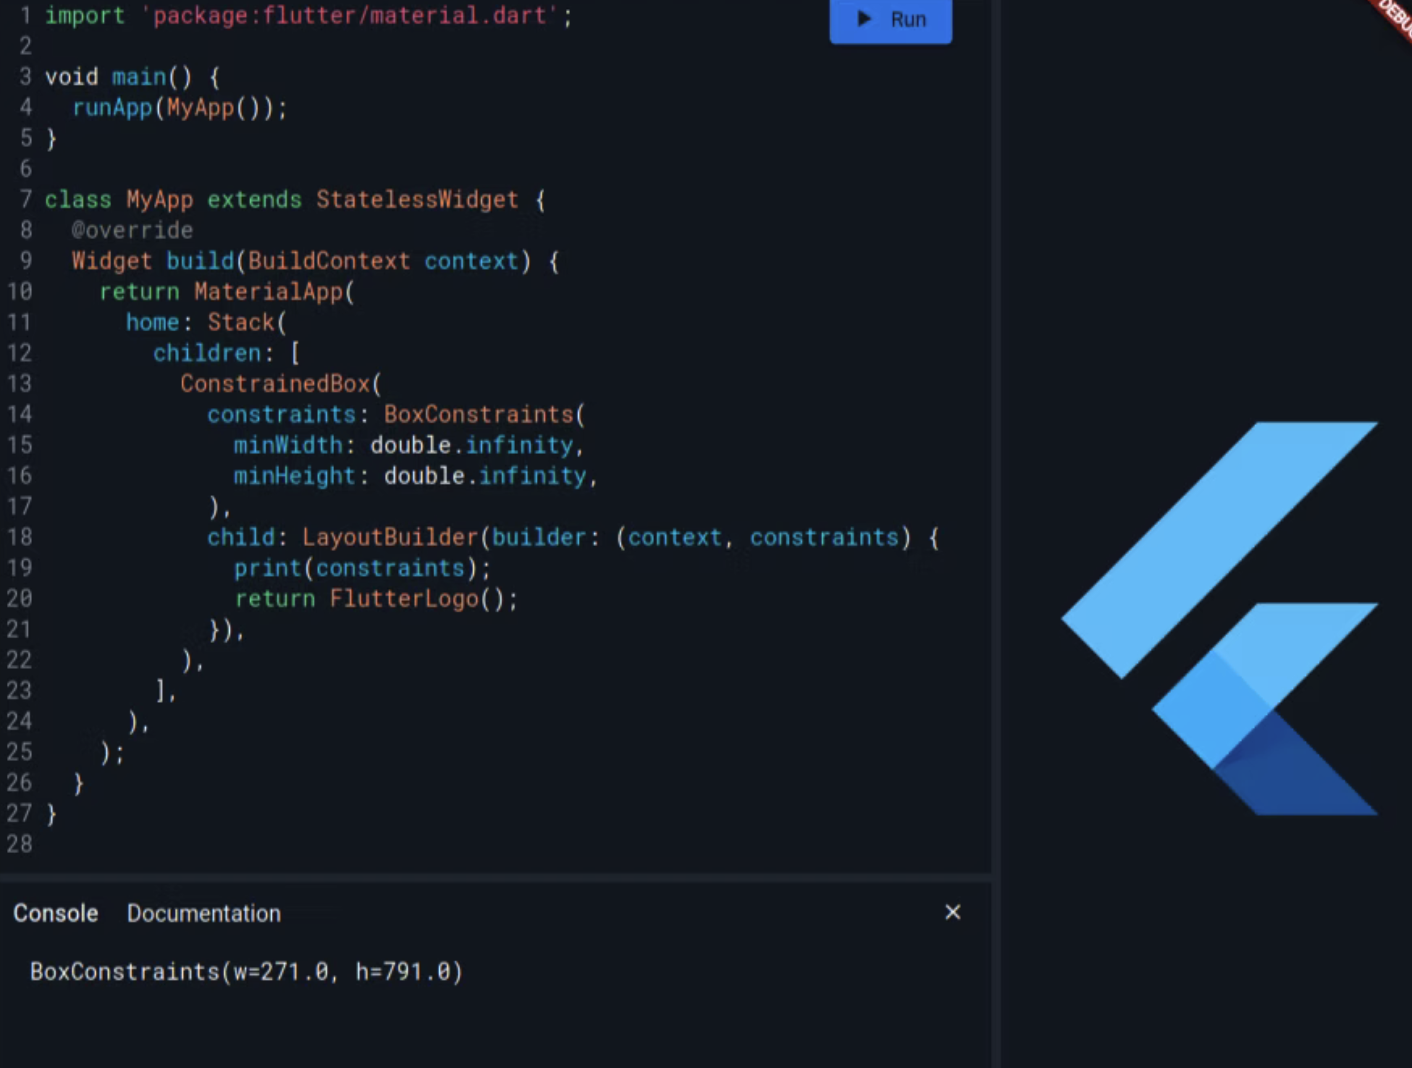
Setting minWidth and minHeight to double.infinity implies we want the widget to be as big as it wants but this value would be normalized to be no bigger than the constraints of the parent, this is a more practical way than finding out the parent constraints or screen size and calculating the values manually.
But what about positioning?
You might wonder what if you want to center the widget but not force it to fill the screen. Well now that you understand constraints lets translate what that widget would have to do. It would have to fill the stack (be as big as its parent constraints allow) and then to let its child (FlutterLogo) size itself (by passing loose constraints: min width/height = 0). Finally it would have to align that widget in its center. Luckily Align and it's specific case Center do exactly that.
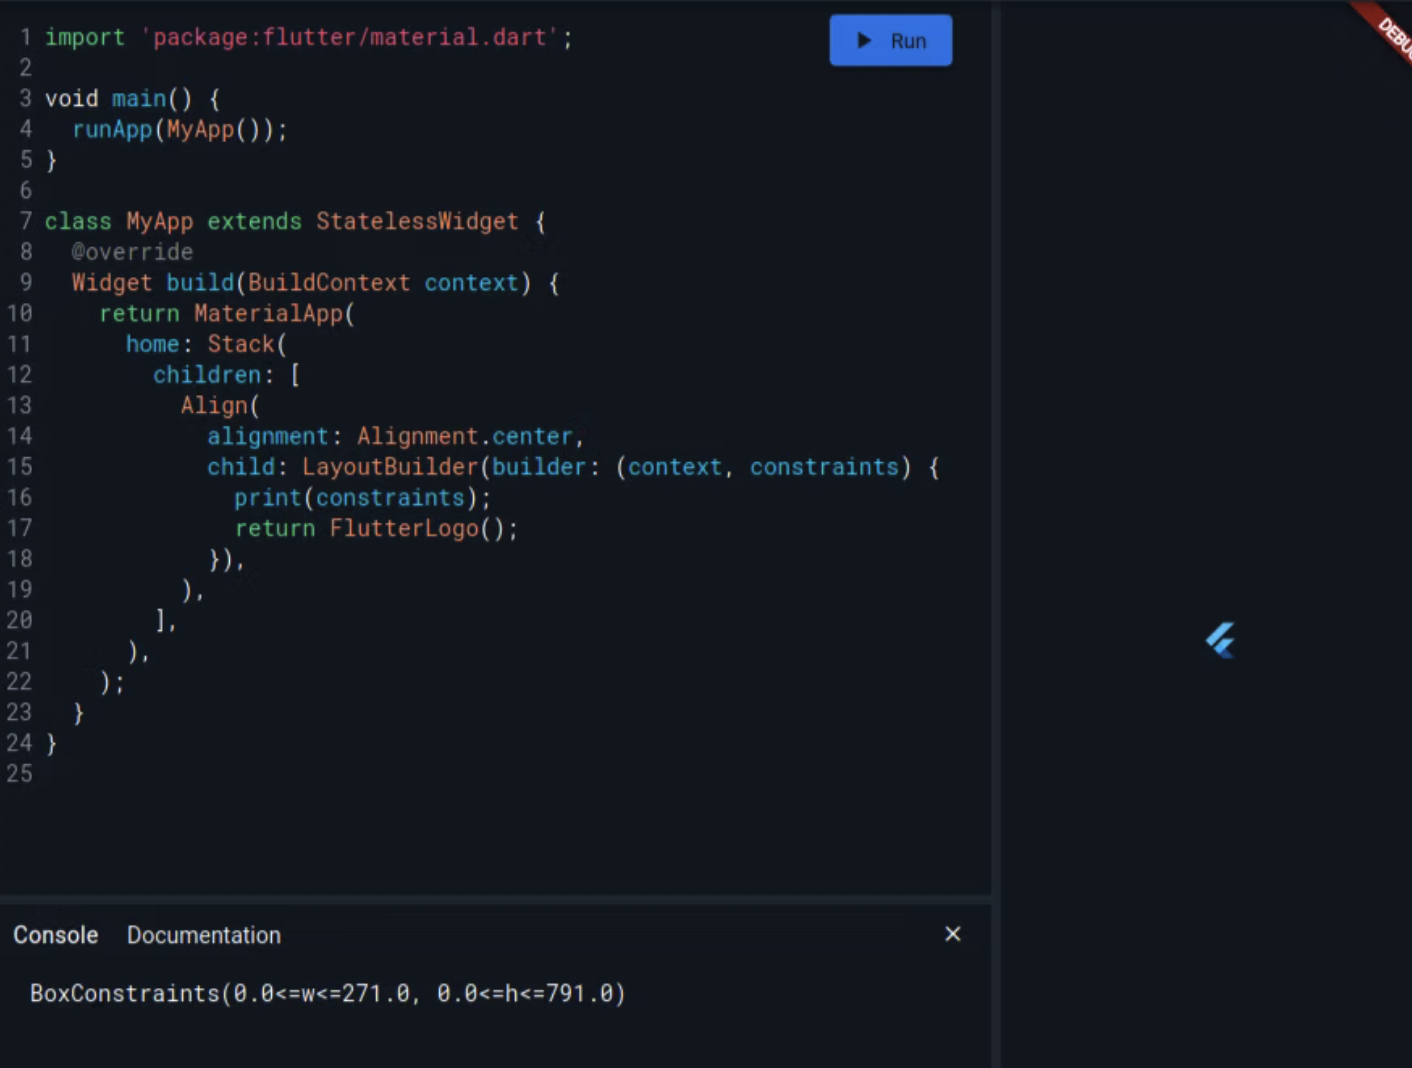
I was using DartPad to show the code along side its result. You can say it's like an online Flutter editor. Give it a try if you want to test out the examples or play around with the theory.